Where recipes are ‘things’ you’d normally produce in-house, in bulk (ie gravy, anchovy mayonnaise), Dishes are the actual items you sell to customers.
These are the menu items you have set up on your POS.
1. Go to Products -> Recipes & Dishes -> Dishes -> Add Dish

2. Fill in the ‘General info’ details such as Dish name, and choose a category (Food or Beverages)

3. Sections
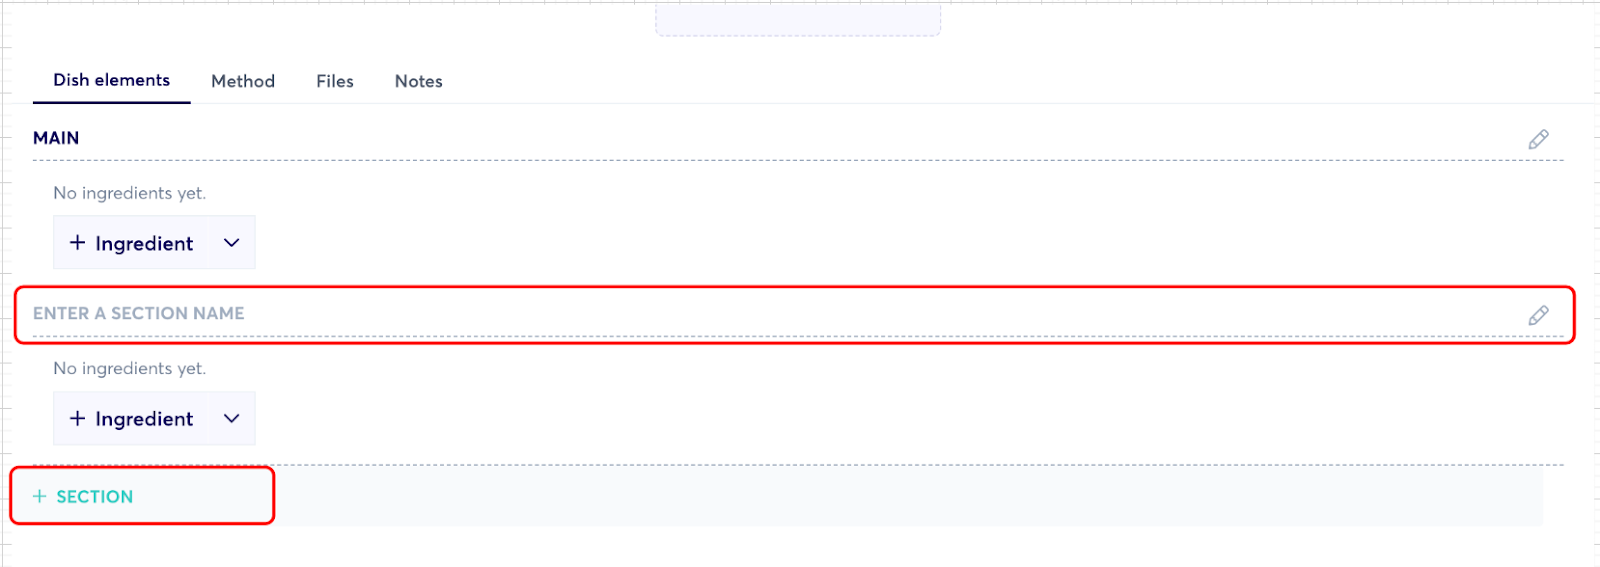
Your dish can contain several sections. For example: Starter, Main and Dessert.
To create a section, click on the ‘+ Section’ -> Add a ‘Section name’

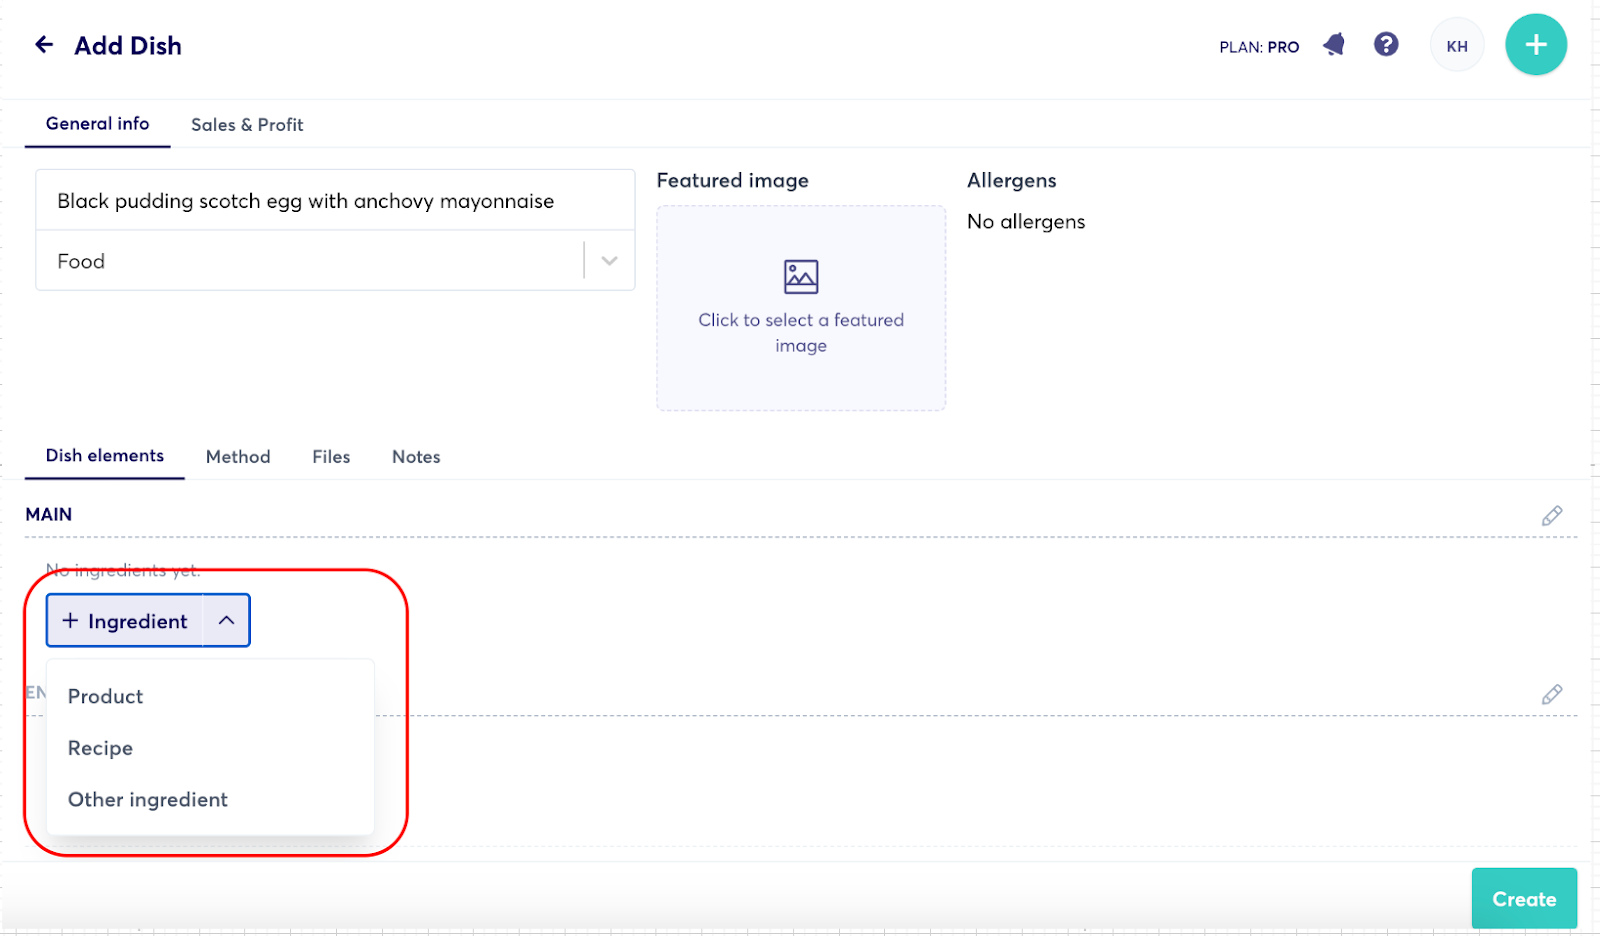
4. Add ingredients in each ‘Section
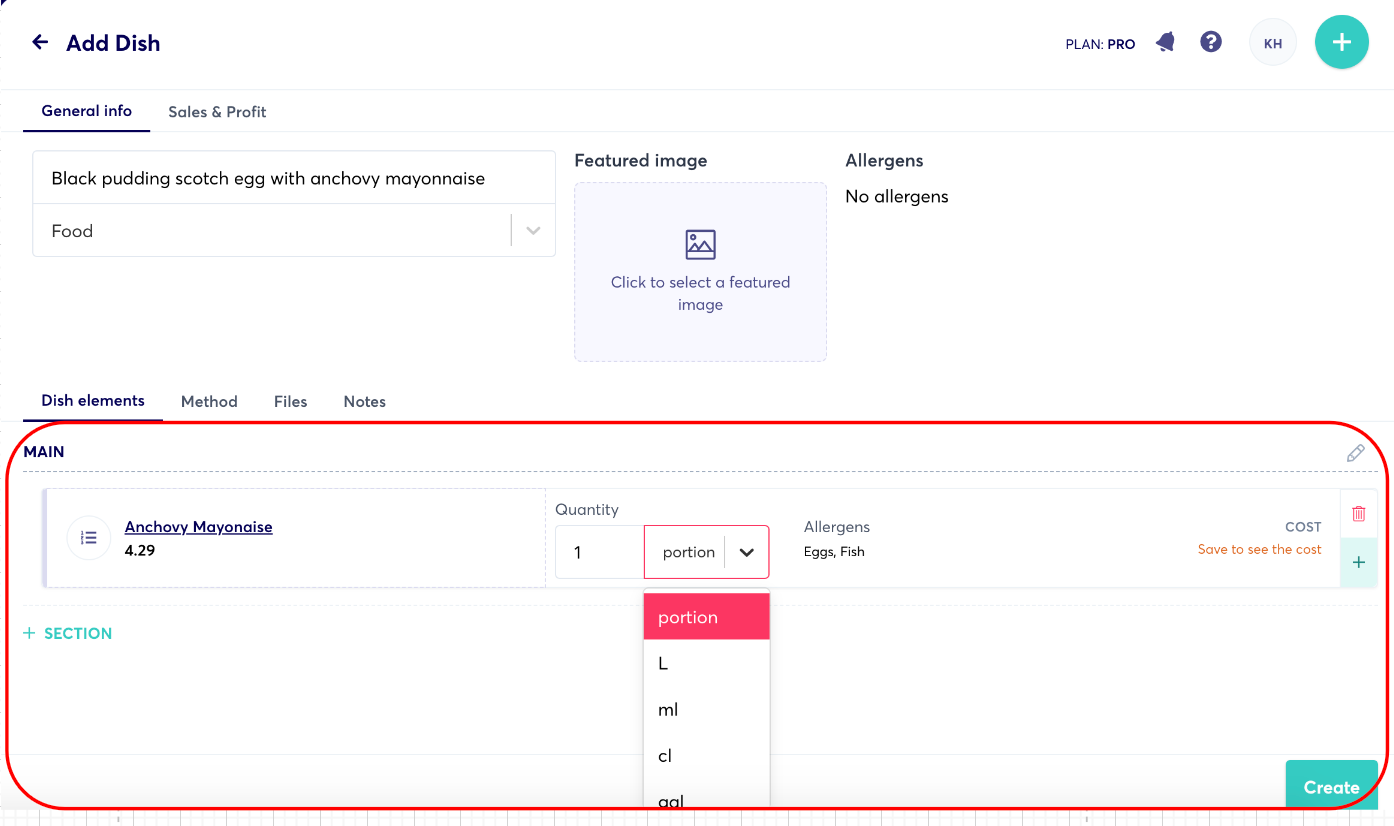
Click on ‘+ Ingredient’ -> Select ‘Product’, ‘Recipe’ or ‘Other ingredient’ -> Add Quantity

Add Quantity

- To add more ‘Ingredients’ to the same ‘Section’ click on the ‘+’ on the right-hand side of the first ingredient you added to this section

- You can also add a picture of your dish

- If any of the added ingredients (Products and/or Recipes) have Allergens assigned to them, these will appear to the right of the image
5. Continue to adding Method, any Files and Notes to make your Dish complete

6. Go to Sales & Profit tab
Here you can see the Cost & Profit of your dish.
- Add the Sales price (this can be Gross or Net) but bear in mind, your ingredients’ cost is most likely in ‘Net’ values
- Add POD ID - this is the ID you have assigned in your POS. This is critical to ensure that the mapping between your sales & dishes is complete. This way, you ensure the accuracy of all the reports in growyze
- You can also add a ‘Target margin %’. Click ‘Save’ to get a ‘Suggested Sales price’

7. Click ‘Create’ to create and save the Dish
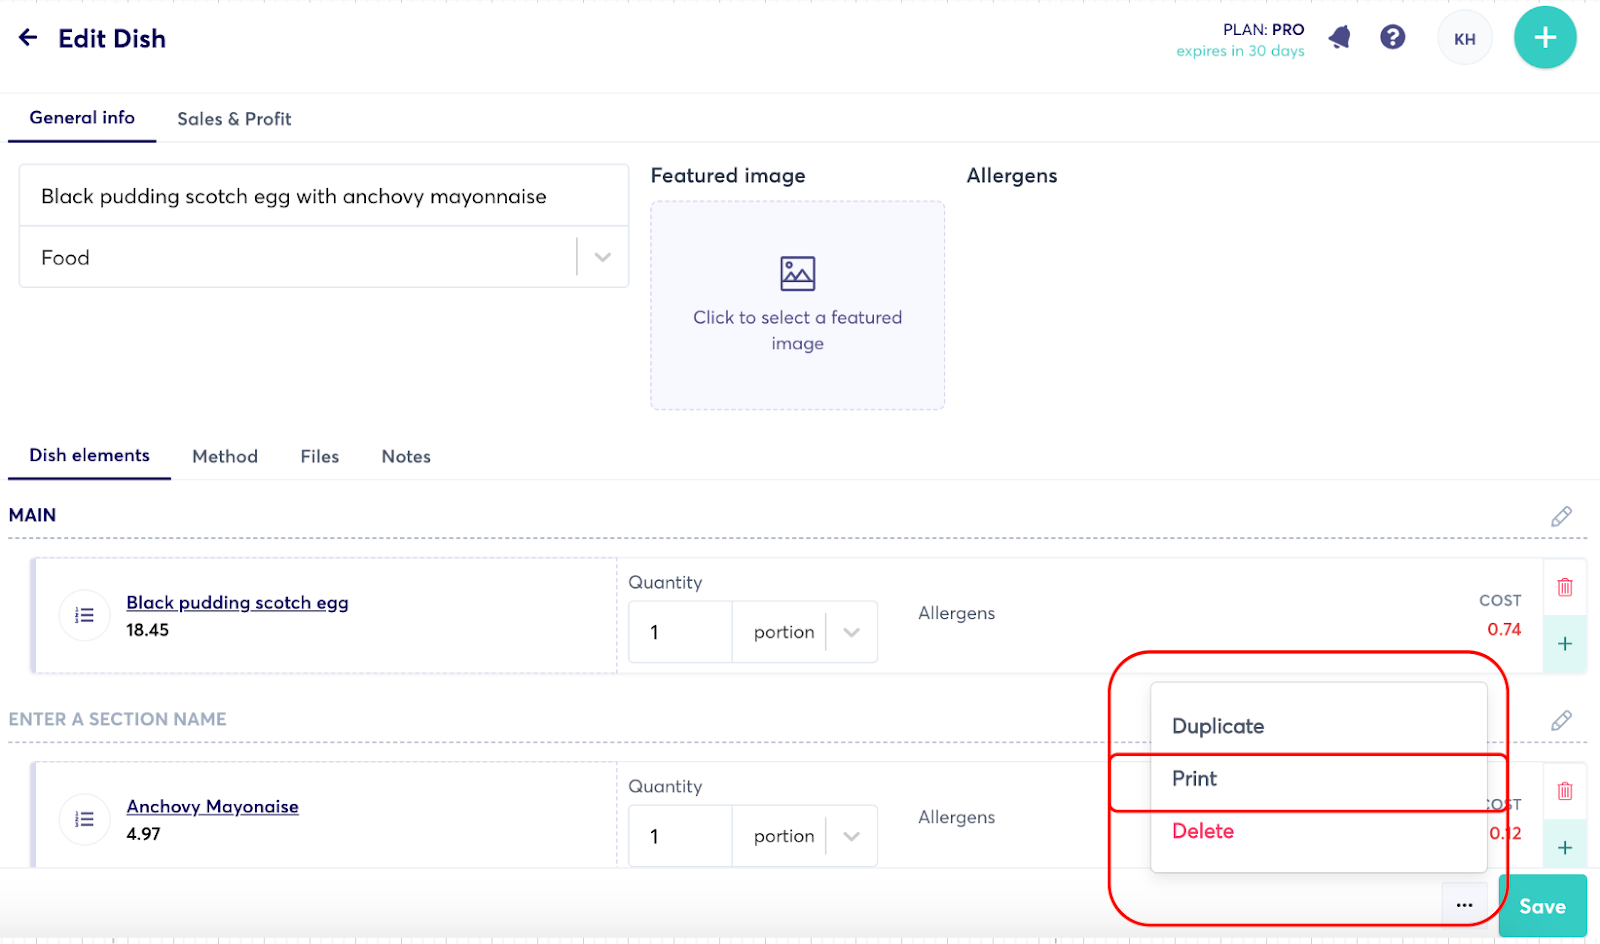
8. Printing a ‘Dish’
Open the Dish you’d like to print -> click on the three dots at the bottom by the ‘Save’ button

9. Deleting a Dish
- From the Dishes dashboard, find the Dish you’d like to delete
- Click ‘Delete’
- Confirm


